我们采用yum的方式安装最新版nginx,就两步即可。最新版本及其他Linux版本可见官方文档
官方文档:http://nginx.org/en/linux_packages.html#stable
请读者根据自己的版本选择配置:
按官方文档,选择自己版本centos可看到步骤:
目录
1. 安装yum-utils
yum -y install yum-utils
2. 配置nginx的yum源
根据官方文档创建/etc/yum.repos.d/nginx.repo文件,并且在文件中写入一下内容。
vim /etc/yum.repos.d/nginx.repo
[nginx-stable]
name=nginx stable repo
baseurl=http://nginx.org/packages/centos/$releasever/$basearch/
gpgcheck=1
enabled=1
gpgkey=https://nginx.org/keys/nginx_signing.key
module_hotfixes=true

[nginx-mainline]
name=nginx mainline repo
baseurl=http://nginx.org/packages/mainline/centos/$releasever/$basearch/
gpgcheck=1
enabled=0
gpgkey=https://nginx.org/keys/nginx_signing.key
module_hotfixes=true
保存退出。
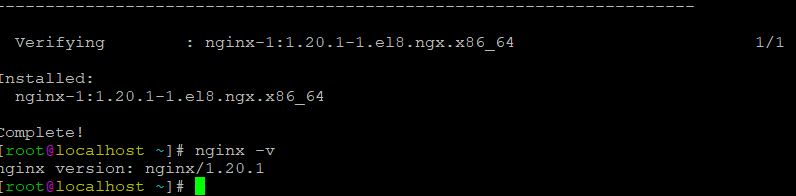
3. 最后默认安装即可,默认安装的最新的稳定版。
yum -y install nginx
安装完成,查看nginx 版本
nginx -v
查看nginx安装目录及其他文件位置:
rpm -ql nginx
systemctl start nginx启动nginx。systemctl enable nginx开机启动nginx。
4. nginx的配置文件
默认全部配置文件。
cat /etc/nginx/nginx.conf
user  nginx;                                                                    #work进程用户(打工者),root是老板
worker_processes  auto;                                                            #work进程数(几个打工者)
error_log  /var/log/nginx/error.log notice;                                        #错误日志文件路径
pid        /var/run/nginx.pid;
events {
    worker_connections  1024;                                                   #一个work可以处理1024个进程
}
http {
    include       /etc/nginx/mime.types;                                           #加载一个配置文件
    default_type  application/octet-stream;  #                                    #默认识别文件类型
    log_format  main  '$remote_addr - $remote_user [$time_local] "$request" '   #定义日志格式
                      '$status $body_bytes_sent "$http_referer" '
                      '"$http_user_agent" "$http_x_forwarded_for"';
    access_log  /var/log/nginx/access.log  main;                                 #指定日志路径
    sendfile        on;
    #tcp_nopush     on;
    keepalive_timeout  65;                                                         #超时时间
    #gzip  on;
    include /etc/nginx/conf.d/*.conf;                                           #扩展配置(虚拟主机配置文件)
}
扩展配置文件,对于单个不同网站配置,由自己创建。
cat /etc/nginx/conf.d/default.conf
#配置一个网站,一个server为一个网站:
server {
    listen       80;
    #站点访问端口,可基于端口(如:8080)访问,或者基于ip访问(如10.10.10.10:8080),端口优先server_name
    server_name  localhost;                #域名
    location / {                        #/匹配URL直接访问 后面加上/URI精确匹配,匹配不到404错误
        root   /usr/share/nginx/html;   #站点目录
        index  index.html index.htm;    #定义首页文件 没有会显示403拒绝访问
    }
    error_page   500 502 503 504  /50x.html; #优雅显示页面信息,报错时显示页面
    location = /50x.html {
        root   /usr/share/nginx/html;            #优雅页面位置
    }
}
注:root和index放在location内为局部变量,只对当前location 的站点目录有效。放外面server下为全局变量,对所有location有效。
其他常用模块,官方模块文档:
http://nginx.org/en/docs/
 location = /pic{
        deny 10.10.10.1/24;        # 拒绝此ip段访问pic站点目录
        allow 20.10.10.1/24;       # 允许此ip段访问pic站点目录
    }
 location /movie {
    auth_basic           "closed site";              #对站点movie目录开启认证功能
    auth_basic_user_file conf/htpasswd;
    #加载密码文件路径,有则可以登录,许自己编写密码密文信息文件,先安装httpd-tool工具,用htpasswd 命令创建密码文件。
}
htpasswd -c ./htpasswd
改完配置文件需要systemctl restart nginx重启服务。
扩展:
fastcgi_param配置文件解释:
fastcgi_param  SCRIPT_FILENAME    $document_root$fastcgi_script_name;#脚本文件请求的路径
fastcgi_param  QUERY_STRING       $query_string; #请求的参数;如?app=123
fastcgi_param  REQUEST_METHOD     $request_method; #请求的动作(GET,POST)
fastcgi_param  CONTENT_TYPE       $content_type; #请求头中的Content-Type字段
fastcgi_param  CONTENT_LENGTH     $content_length; #请求头中的Content-length字段。

fastcgi_param  SCRIPT_NAME        $fastcgi_script_name; #脚本名称
fastcgi_param  REQUEST_URI        $request_uri; #请求的地址不带参数
fastcgi_param  DOCUMENT_URI       $document_uri; #与$uri相同。
fastcgi_param  DOCUMENT_ROOT      $document_root; #网站的根目录。在server配置中root指令中指定的值
fastcgi_param  SERVER_PROTOCOL    $server_protocol; #请求使用的协议,通常是HTTP/1.0或HTTP/1.1。

fastcgi_param  GATEWAY_INTERFACE  CGI/1.1;#cgi 版本
fastcgi_param  SERVER_SOFTWARE    nginx/$nginx_version;#nginx 版本号,可修改、隐藏

fastcgi_param  REMOTE_ADDR        $remote_addr; #客户端IP
fastcgi_param  REMOTE_PORT        $remote_port; #客户端端口
fastcgi_param  SERVER_ADDR        $server_addr; #服务器IP地址
fastcgi_param  SERVER_PORT        $server_port; #服务器端口
fastcgi_param  SERVER_NAME        $server_name; #服务器名,域名在server配置中指定的server_name


Pingback引用通告: nginx反向代理与负载均衡简介与配置 - 运维笔记(ywbj.cc)
Pingback引用通告: docker容器安装与部署,以及常用命令使用 - 运维笔记(ywbj.cc)